- What is TestInvite?
- Build Your First Test
- Run Your First Assessment
- Taking the Assessment
- Viewing the Results
- Question Bank Overview
- Common Question Features
- Question Types
- Creating Questions
- Organizing Questions
- Content Blocks
- Roles & Access
- Media Library
- Import & Export
- Question Submissions
- Question Bank Schema
- Browsing Questions
- Cloning Questions
- Bulk Updating Questions
- Tests Overview
- My Tests
- Creating a Test
- The Test Editor
- Test Settings
- Sections & Pages
- Adding Questions
- Page Builders
- Test Profile
- Reporting
- Test Papers
- Analytics
- Publishing a Test
- Test Library
- Marketplace
- Tasks Overview
- Creating a Task
- Task Dashboard
- Steps
- Task Settings
- Candidates
- Test Sessions
- Sent Mails
- Proctoring
- Analytics
Viewing the Results
Switch back to the admin view, find the result from the assessment you just took, and explore the score report.
You have just submitted an assessment as a candidate. Now switch back to your admin account and see what the result looks like from your side. This is the payoff — the moment everything comes together.
Step 1: Go to the Task Dashboard
In your admin browser, navigate to Tasks in the left menu and open the Task you created. You land on the Task dashboard.
On the dashboard you will see three stat cards: Candidates, Participants, and Test Sessions. The test session you just completed is already counted.

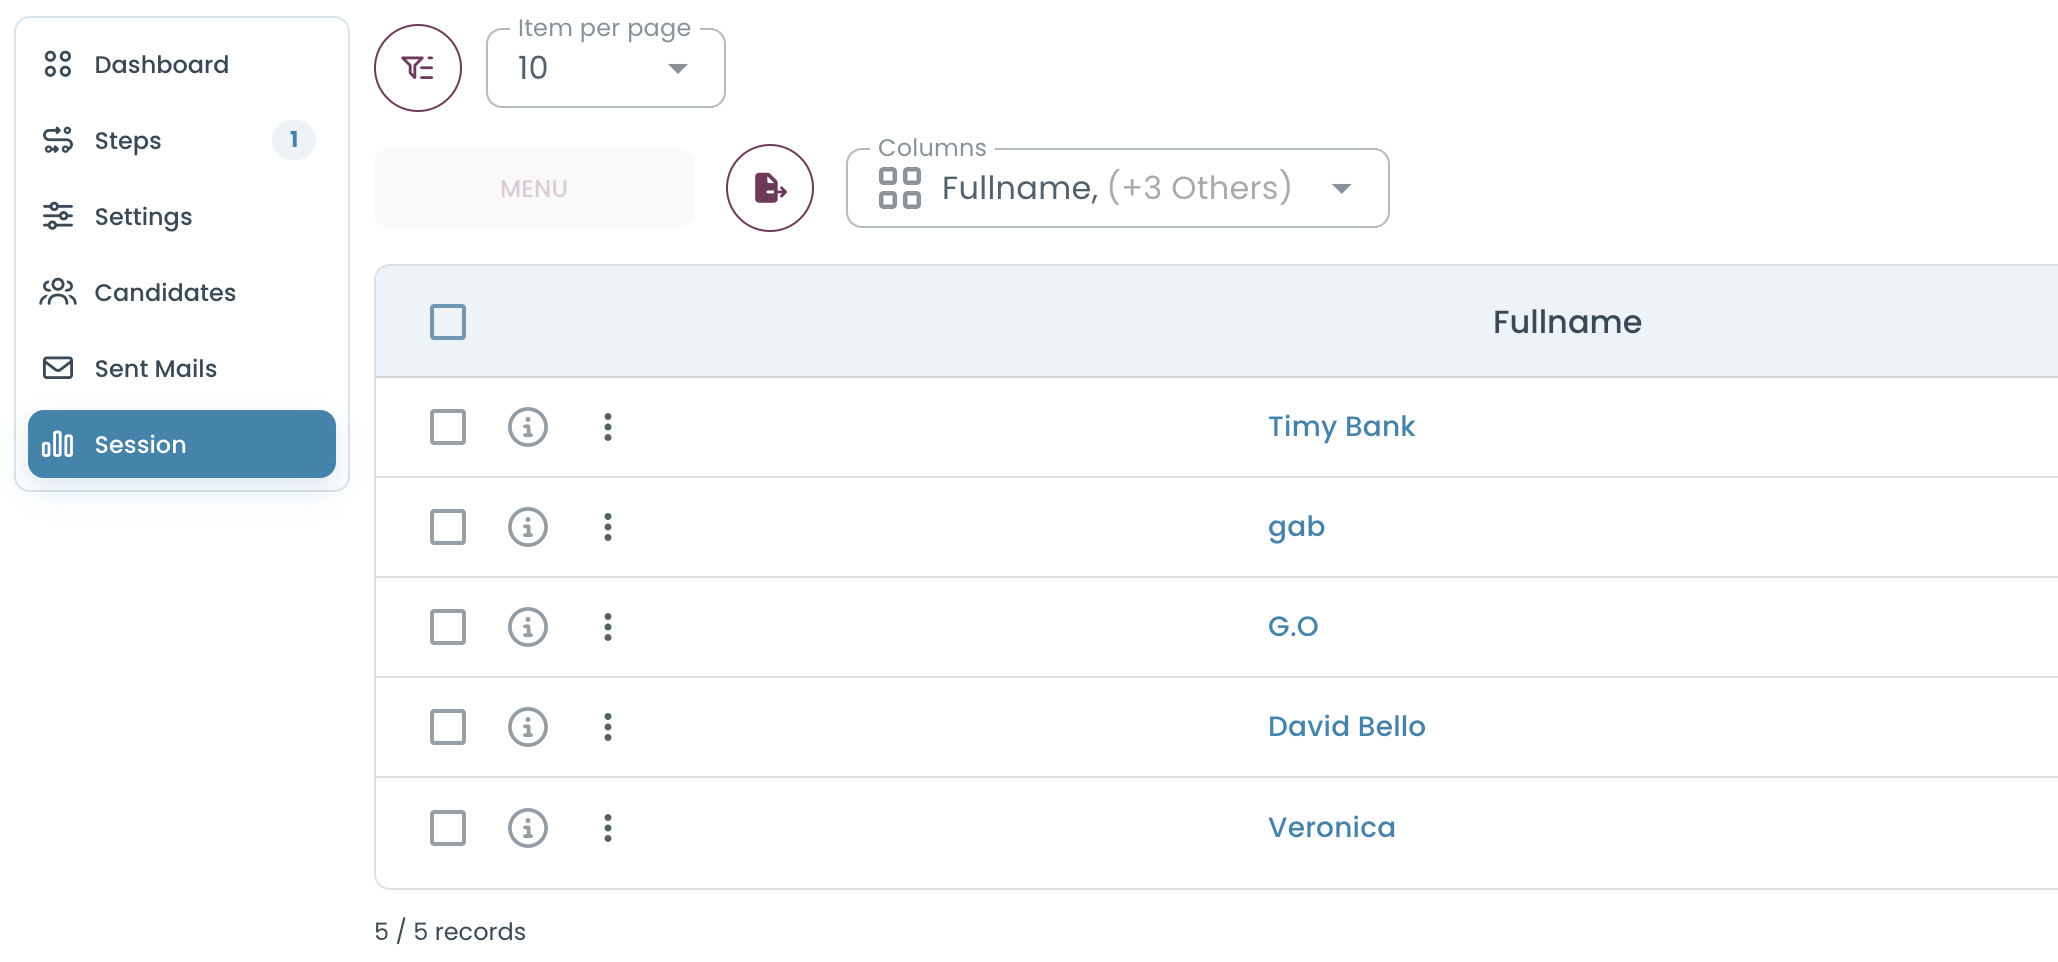
Step 2: Open the Sessions Tab
Click the Sessions tab at the top of the Task editor. This is where all test session results live. You will see the session you just submitted listed with your name, score, and status.
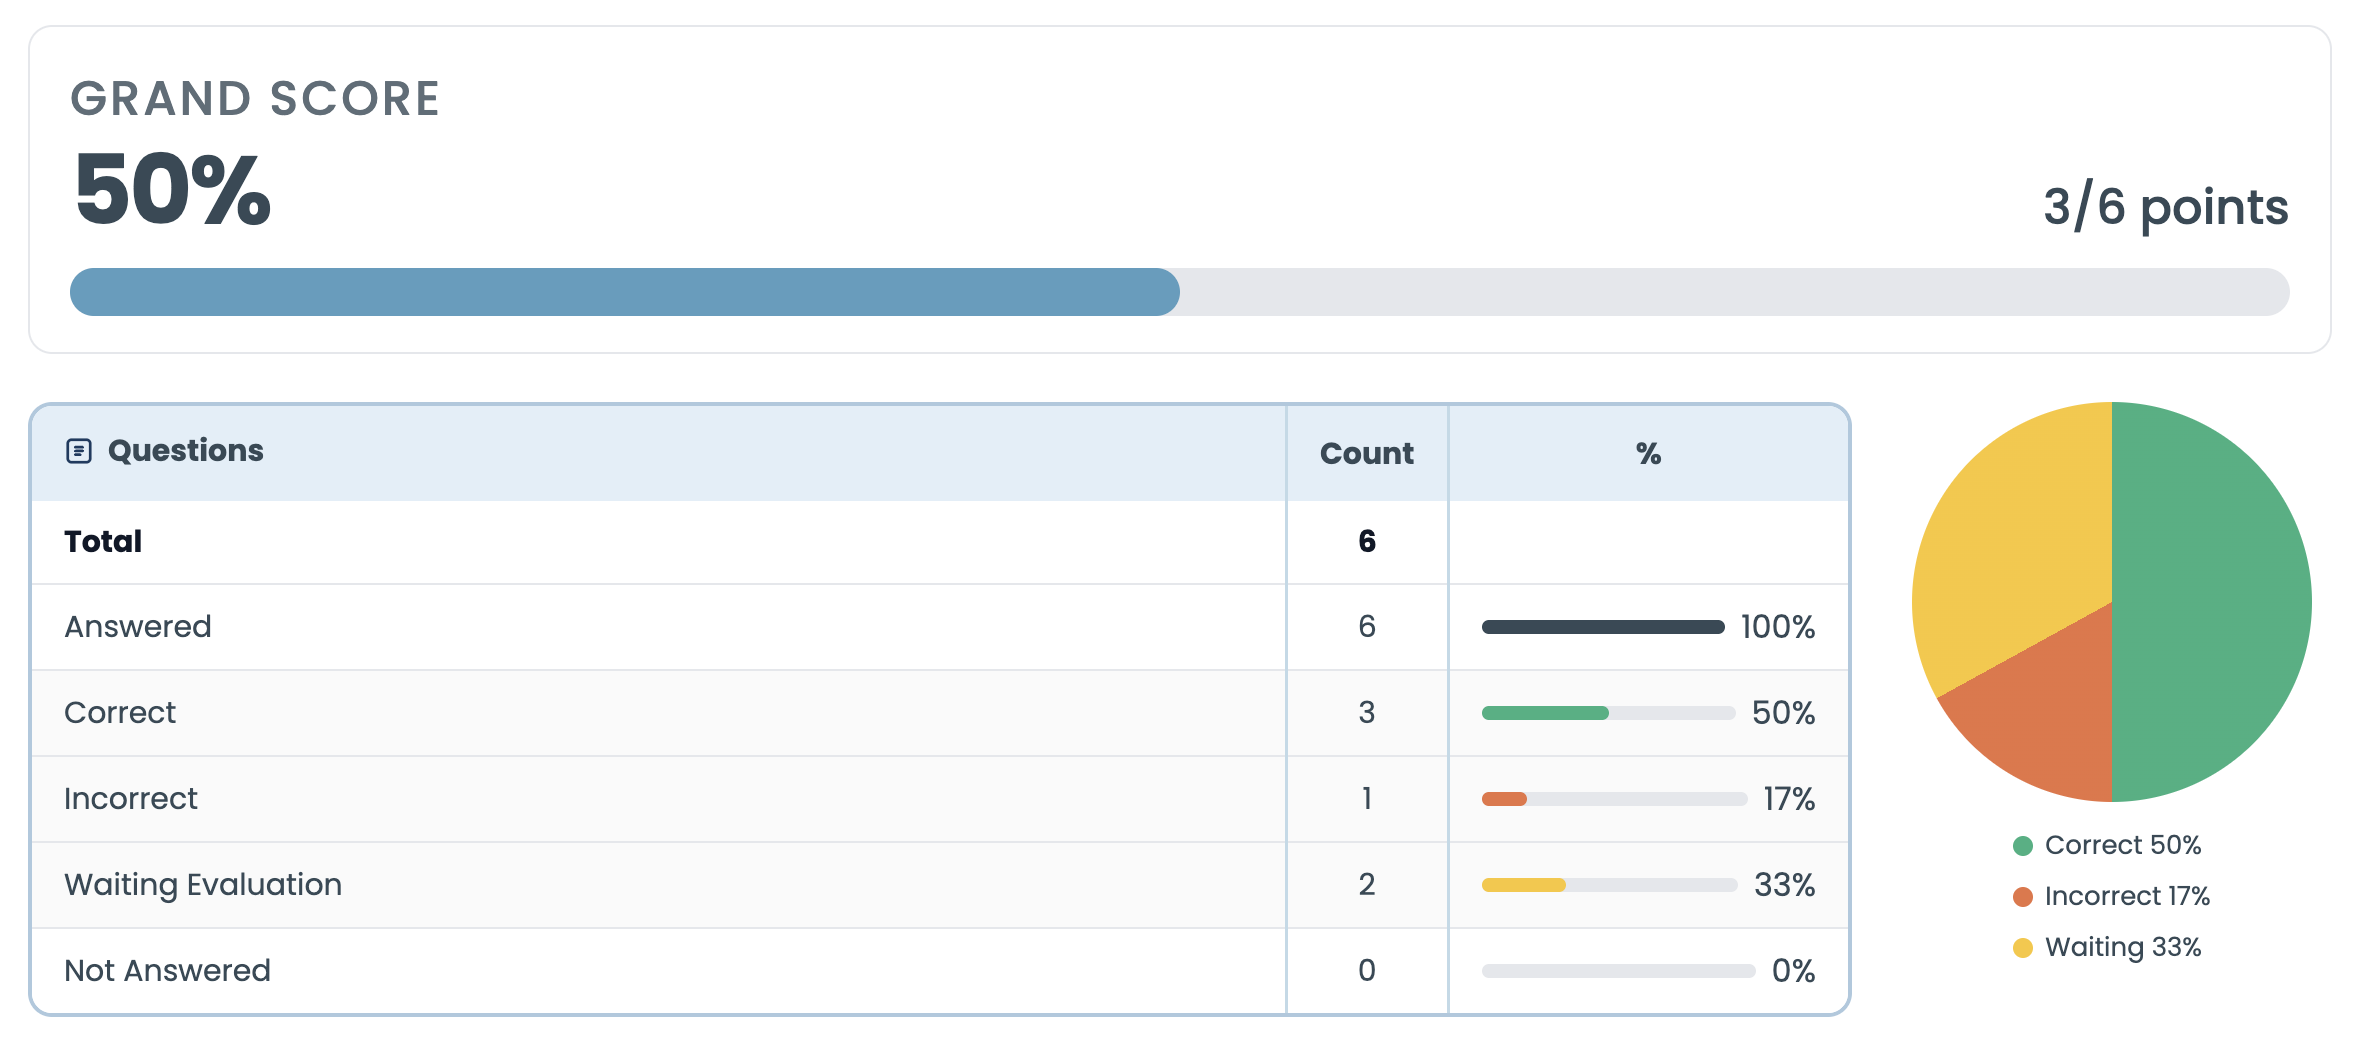
Step 3: Open the Score Report
Click on the session row to open the full result. The score report shows:
- Total score — the candidate’s overall points and percentage.
- Per-question breakdown — which questions were answered correctly, which were wrong, and how many points each was worth.
- Pass / fail status — whether the candidate met the threshold you configured (if any).
- Dimension scores — if your questions are tagged with scoring dimensions, you will see a per-competency breakdown here.
You Have Completed the Full Loop
In just a few steps you have built a test, created an assessment, experienced the candidate journey, and reviewed a result. This is the core of what TestInvite does — everything else in the platform is about doing this better, faster, and at scale.
From here, explore the rest of the guide to learn about the Question Bank, advanced Task configuration, proctoring, detailed analytics, and more.
If the test uses scored dimensions, the dimension breakdown also lists each scored dimension with its own achieved and total points — parent paths aggregate their children.