Getting started Product Tour Question Bank Question Types Test Editor Grading and Evaluation Lockdown Browser Online Proctoring
Organization management Setting Up Your Organization General Settings Configuring Consent Process Branding Plans & Credits Understanding Subscription Plans Managing Credits Changing Subscription Plans Billing Settings Credit Notifications Users and Collaboration Roles and Permissions Adding New Users & Assigning Roles Importing Users Organizing Users into Teams Advanced Permissions & Access Control User Login Controls Monetization
Question Bank Creating a Question Adding Image Adding Audio Adding Video Adding File Editing Layout Adding Feedback Adding Hint Math Input Importing Questions Question Reporting Scoring Question Types Multiple Choice Questions Matching Questions Text-Based Questions Rich Content Questions Numeric Questions Coding Questions Audio Recording Video Recording Photo Capture File Upload Fill-in-a-Table Questions Organizing Questions Folders and tags Batch update Schema Browsing Questions Exporting Questions Presets Composites
Tests (deprecated) Creating a Test Pages Sections Adding Questions Previewing Test Setting Profile Test Type Test Navigation Time-Limits Auto Numberings Mandatory Question Security Shuffling Deprecated Customize Section Weights Randomization Reporting
Tests Creating a New Test Test Settings Quick Exam Creation Creating Randomized Tests Adding Questions Sections Automatic Question Exclusion Shuffling Pages Time Limit Navigation Control Section Introduction Page Structure Shuffle Questions Time Limit Layout
Tests

Creating a New Test

In TestInvite, tests are created from the Tests area. When creating a test, you define the basic information and the initial section structure.

Updated 2026/04/17

To start creating a test:

  • Go to the left menu and click Tests
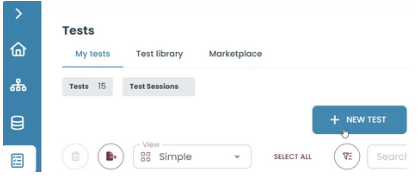
      • Click on New Test
        When creating a test, you define the basic information and set up the initial structure.
        When creating a test, you define the basic information and set up the initial structure.


        Enter your test details, organize it into sections, and click Save to create your test.
        Enter your test details, organize it into sections, and click Save to create your test.

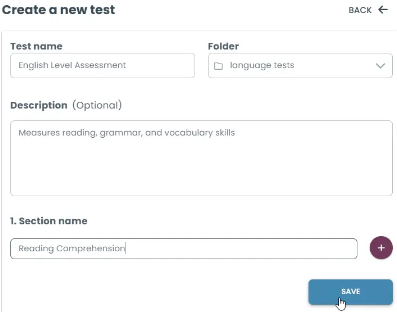
        Test Name: Choose a clear and descriptive title so you can easily identify it later.

        Folder: Folders help you organize your tests into groups. You can place your test inside an existing folder (e.g., “Language Tests”) or create new ones to structure your content. This is especially useful when you have many tests, as it keeps everything categorized and easy to find.

        Section: Sections divide your test into parts. Each section can represent a topic or skill (e.g., Reading, Grammar). This helps structure the test and allows you to group related questions together.

        In short

        - Go to Tests → Add New Test

        - Enter Test Name

        - Select a Folder

        - (Optional) Add Description

        - Create at least one Section

        - Use + to add more sections

        - Click Save

        Test Structure


        A test follows this structure:

        Test → Section → Page → Question

        Sections: organize the test

        Pages: belong to sections

        Questions: are placed inside pages

        Page Settings & Adding Questions

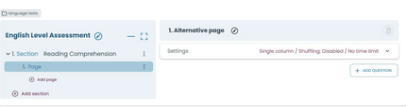
        The Test Structure screen is divided into two connected areas. On the right side, you configure the selected page by adjusting its settings and adding questions.

        Add sections and pages to structure your test, then configure settings and start adding questions.
        Add sections and pages to structure your test, then configure settings and start adding questions.

        Page Settings 

        The right panel is where you configure the selected page and build its content.

        What you can do:


        • Adjust page settings (title, instructions, layout)
          • Add and edit questions
            • Control how the page appears to candidates
              Adjust layout, question shuffling, and time limit settings before adding questions.
              Adjust layout, question shuffling, and time limit settings before adding questions.

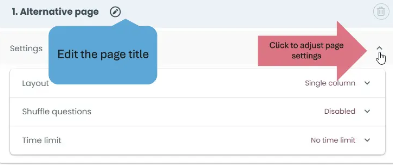
              These settings allow you to control how the page behaves, including its layout, whether questions are shuffled, and if a time limit is applied.