
TestInvite supports multiple languages. When you are building an assessment process, you can set the language to be used in the user interfaces throughout the assessment process. If your preferred language does not exist among the options, you can contact us so that we can add your language to the list as well.
The language that you set will be the default language for your assessment process, meaning that all the test takers will face screens in your preferred language. However, you can overwrite the default language for a particular candidate. Similarly, the test-taker can also change the language so that the screens are displayed in a language he/she is more comfortable with.
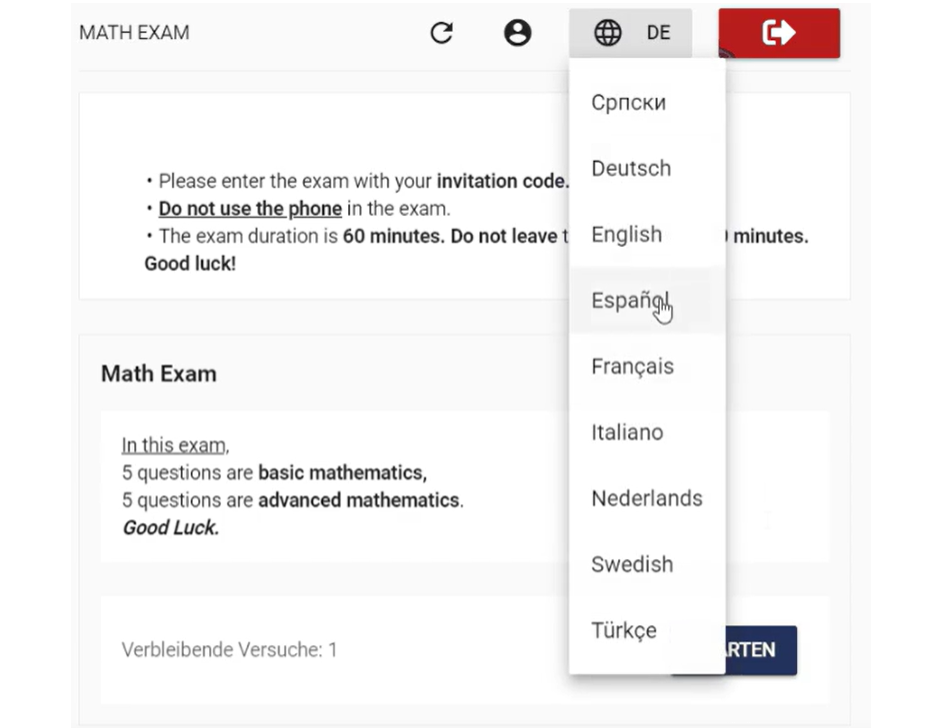
If the language you prefer does not exist in options, you can contact us to add it to options.
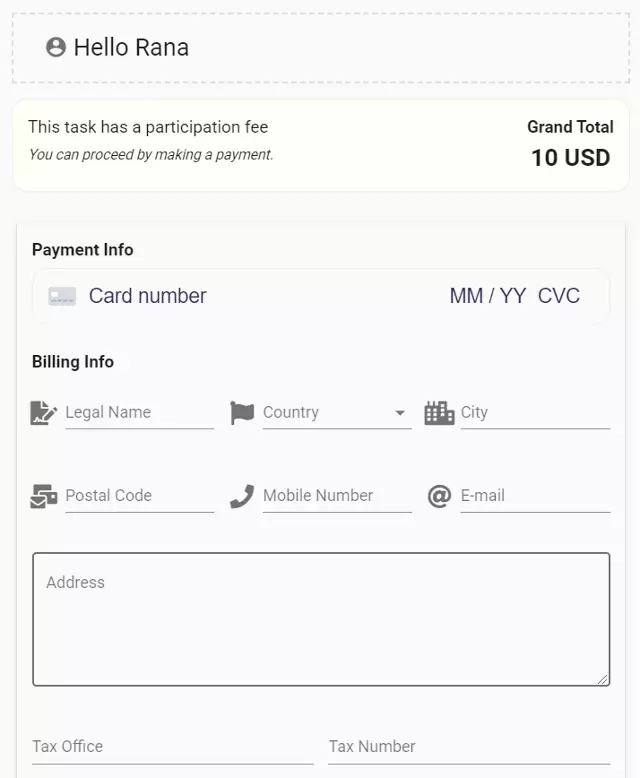
It is possible to determine a participation fee for your assessments. In this way, candidates can participate in your online tests, exams or inventories after having paid the determined fee.
It is possible to determine the which authentication method will be used for the participation in the assessment process.
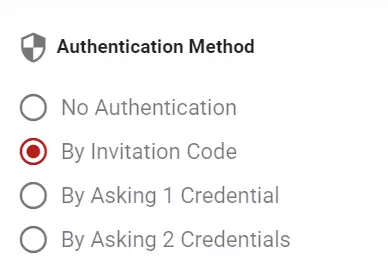
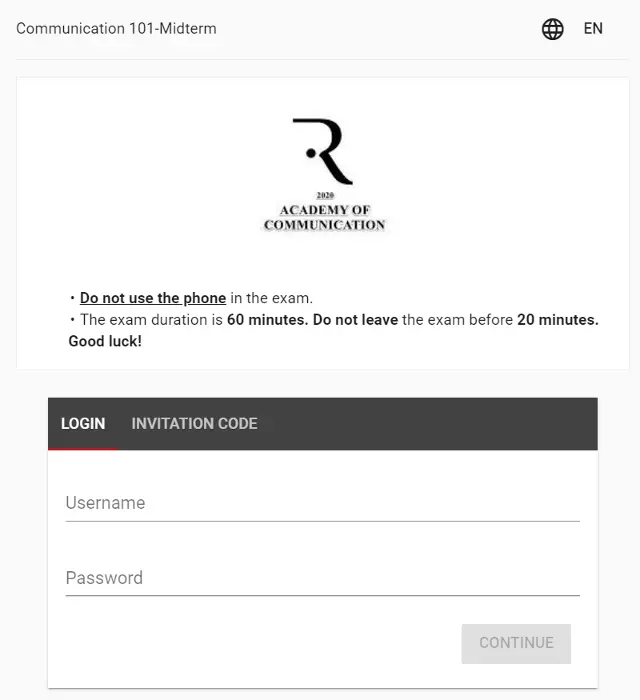
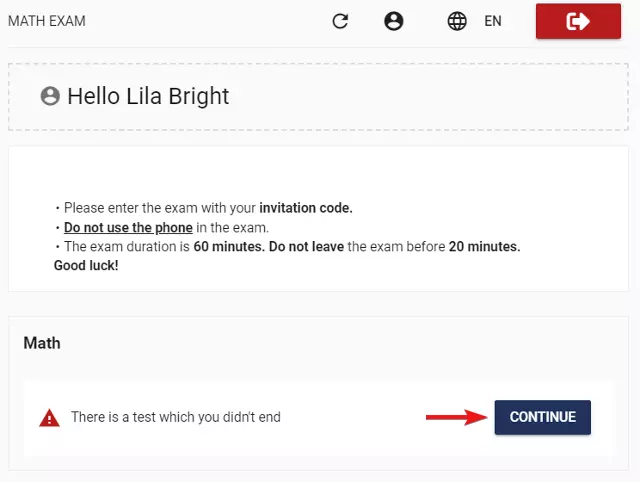
The assessment system can generate a unique invitation code for each candidate defined within the system. Through this method, each candidate authenticates using his/her unique code and accesses to the examination process.
There are two methods to deliver the unique invitation codes that are generated for each candidate:
You can ask candidates to authenticate by entering any unique identification code. Examples:
In this case, candidates can only authenticate by writing one of their unique identification codes and access the examination system.
You can ask candidates to authenticate through two unique identification informations. Examples:
In this case, candidates can only authenticate through the information registered to the exam system and access the assessment process.
You can disable the authentication step in the assessment process. In this case, anyone who visits the unique link for the assessment process, can participate in your exams.
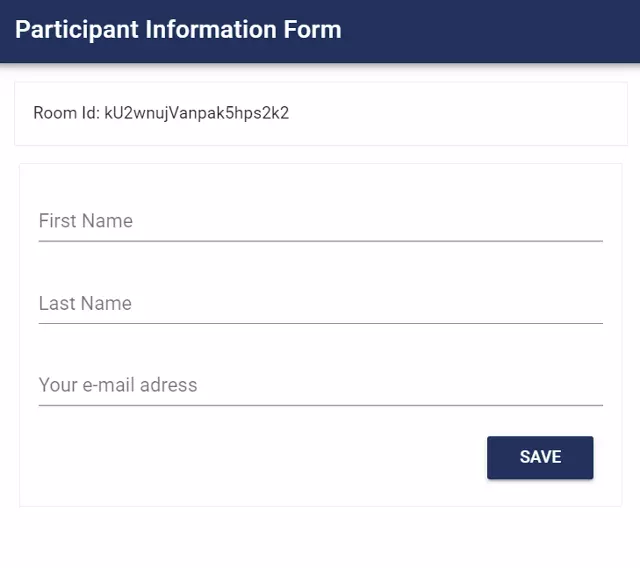
You can collect data from candidates in the beginning of the assessment process. In order to do this, you can create a form and ask any question to the participants. Candidates can start the assessment process after having filled the form you created.
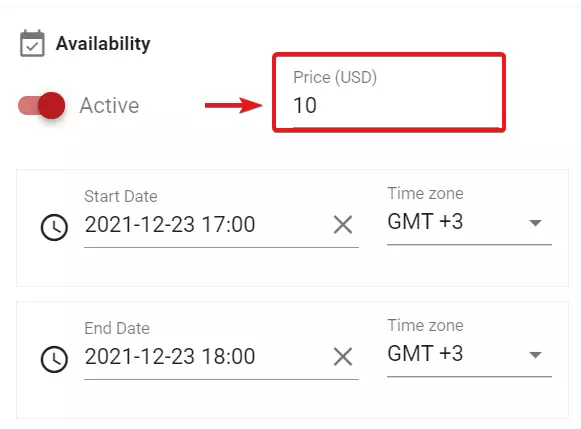
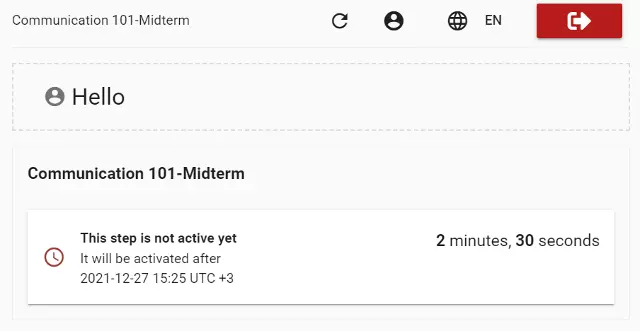
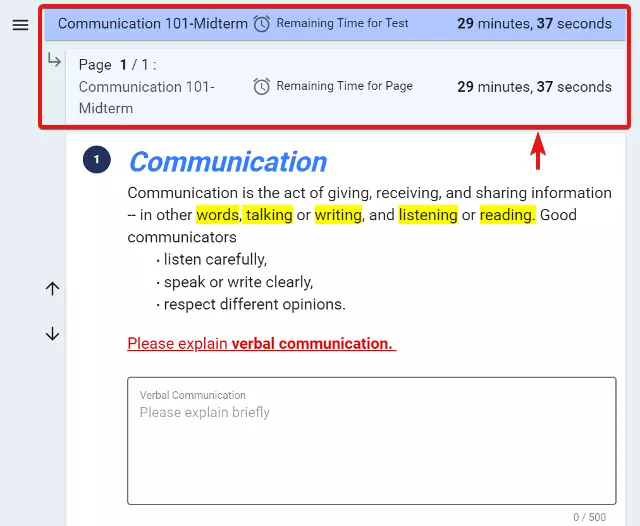
You can determine the accesibility of the tests or online exams through active-passive options. You can set time period in which candidates can enter the test or exam that is in the active state, by appointing beginning/ending date and hour for the assessment process.
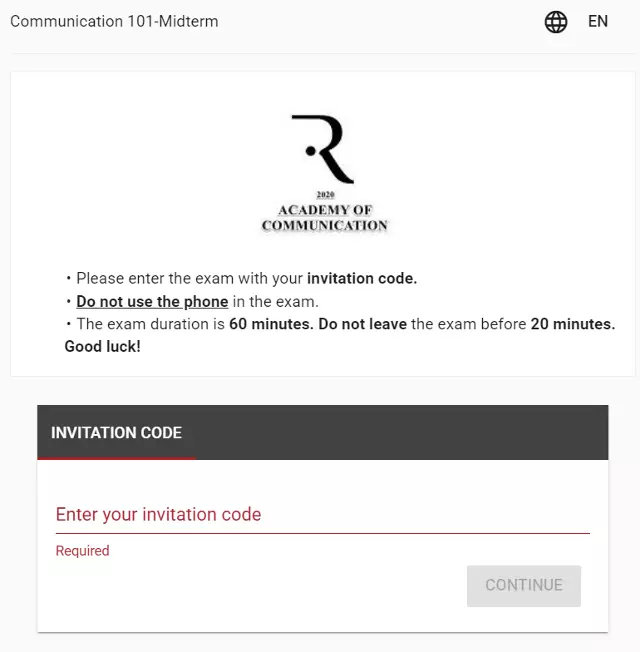
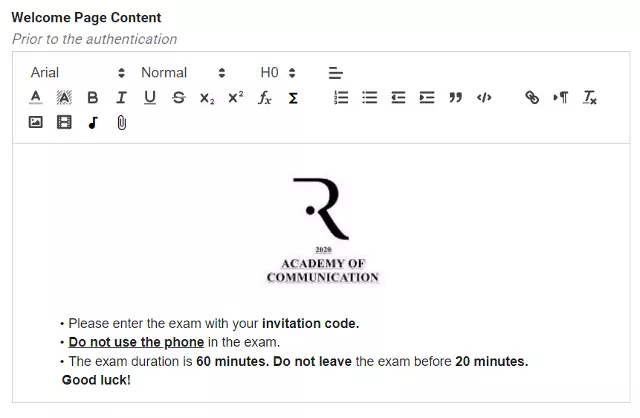
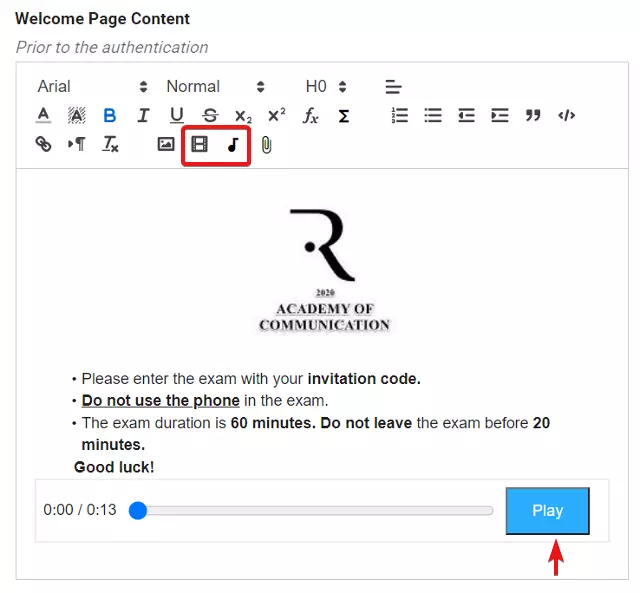
A welcome page is where you welcome your test takers and inform them about your assessment process. By using the rich content editor, you can add any kind of content like formatted texts, images, audios or even videos into this page. Because the welcome page is the first page that your candidates will face, it is good to let them know about what the assessment is about, how they can authenticate and proceed, what the steps are, who they can contact with in case they need support etc.
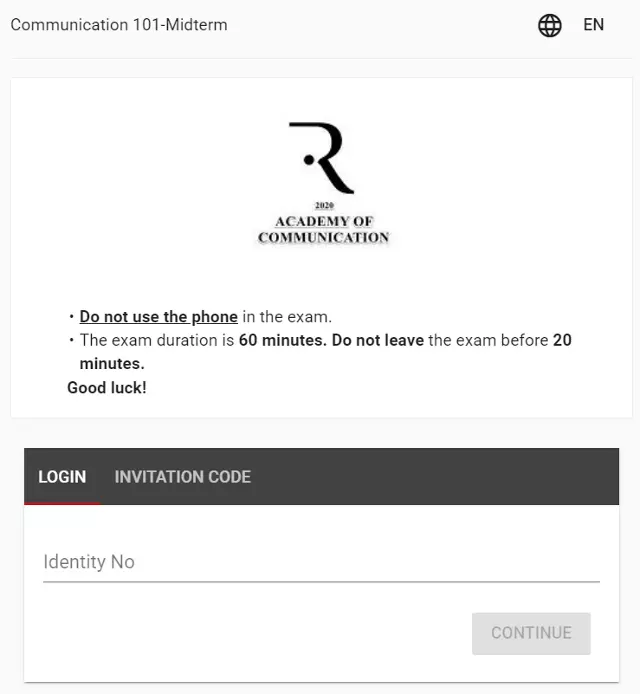
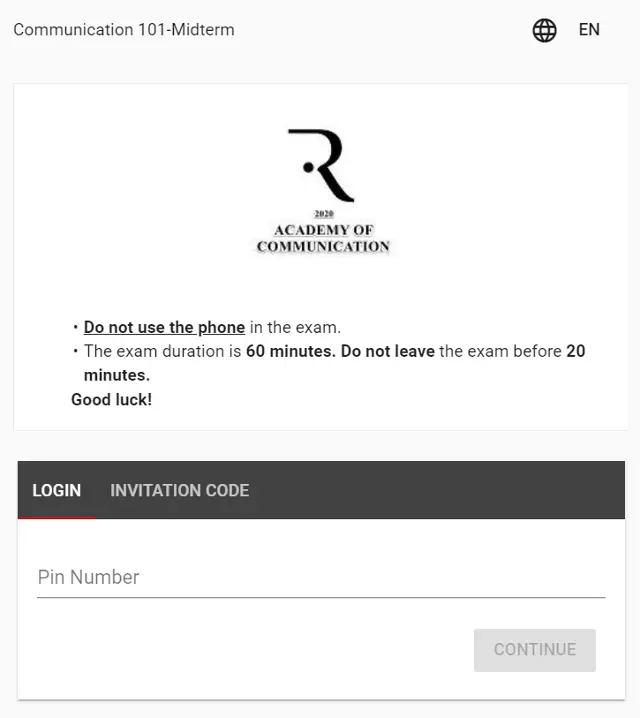
If you enable authentication for your assessment, the system will automatically inject the login panel into this page. Depending on how you configured the authentication settings, the candidate will be asked to enter the required credentials like invitation code, username & password, access code, PIN number, ID number etc.
Because the welcome page is the first page that your candidates will face, it is good to inform them through the page, about important points of the assessment process. For example you can give answers of following questions:
You can add your organization’s logo into the Welcome Page. The company logo will make the page warmer. It will also help you brand the page and look more professional. Moreover, the test takers will ensure that they are at the right place.
You can add audio and video into the Welcome Page. The audio and video instructions may help the candidates to better understand the assessment process.
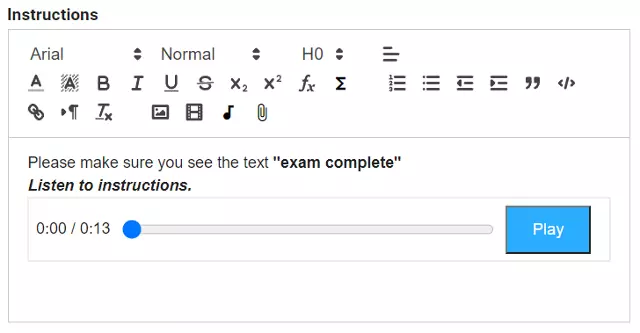
After the Welcome Page comes the Assessment Page where you can add the general instructions about the assessment process. If your assessment is set up so that it requires authentication, this page is only shown to the ones who successfully authenticate. In this case, your content will only be visible to the people who are given access. You can give brief informations in instructions such as:
Like the Welcome Page, the instructions of the Assessment Page can also have rich formatted contents and media materials like image, audio and video.
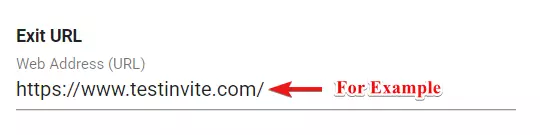
The system can redirect your users to another page after they complete the assessment. The “Exit URL” property is where you can define the URL of the page that the users will be redirected to.
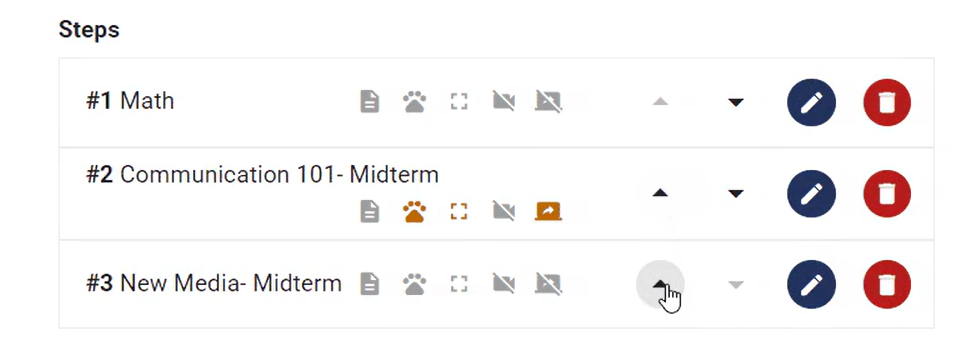
Your assessment can have one or multiple tests. For every test that you would like it to be part of the assessment, you can add a new step and assign one of your tests or a test that you bought from the library.
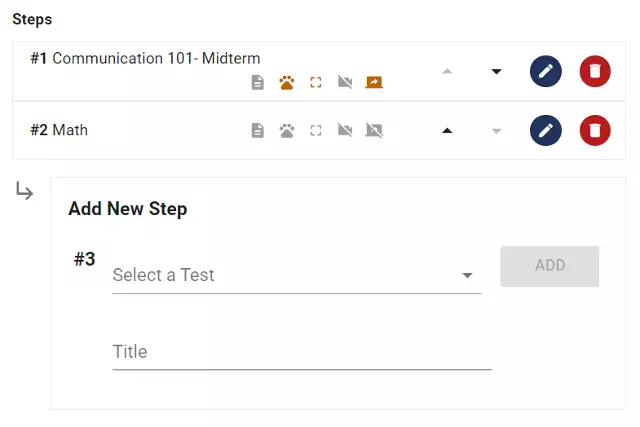
You can change the order of your tests. The tests will be listed in the same order. Changing the order may be important if you define some continuation rules. One continuation rule can ensure that the candidate can proceed with the following test only if he/she got a passing score in the previous test.
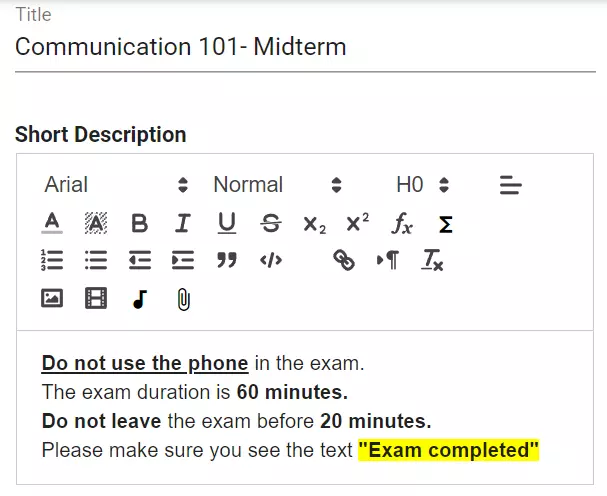
Each of your tests in the assessment can have its own instructions. The instruction content can have rich content, images, audio, video and file attachments. The test’s instruction is the perfect place to let participants know the time limits, the number of sections or questions, navigation restrictions, security practices and so on.
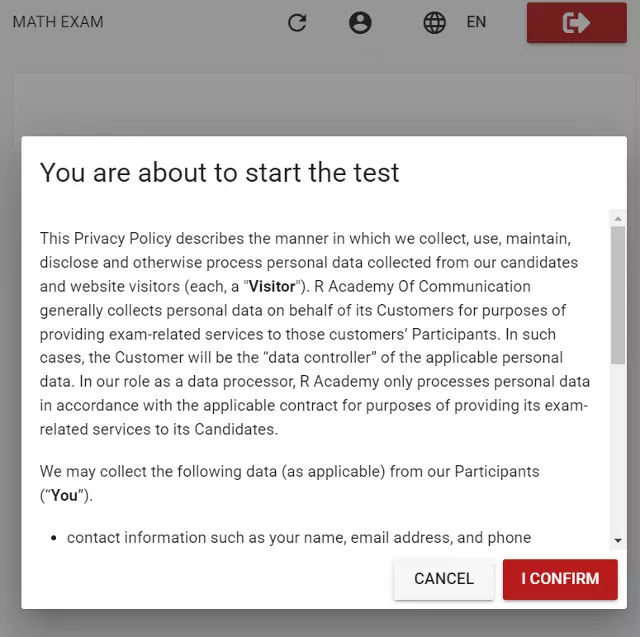
Each of your tests can have its own consent statement. You can ask the candidates to agree to a consent statement outlining data transfer practices, privacy practices, how cookies are used, or other policies.
Each test in the assessment has its own delivery settings. The delivery settings include multiple configurations from access dates to device restrictions to proctoring methods etc.
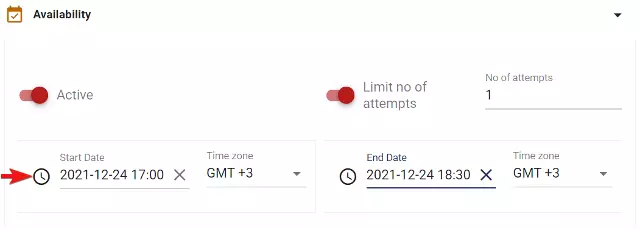
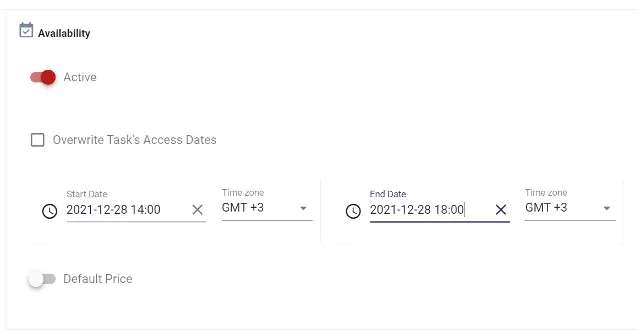
You can configure when your test will be available. You can do it by configuring a start date, end date or both.
You can set a start date and time for your test, which will make your test available only after the specified start date & time.
You can set an end date and time for your test, which will make your test available only before the specified start date & time.
By default, all the dates and times that you enter will be interpreted in your organization’s default timezone. However you can customize the timezone when you enter a date or time.
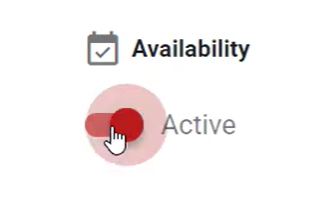
You can manually make one of your tests active or passive. Once a test is made passive, no one can start the test. However, even if you make a test active, the date restrictions will still apply. So if you want someone to be able to start your test, both your test should be active and the date restrictions should not prevent access.
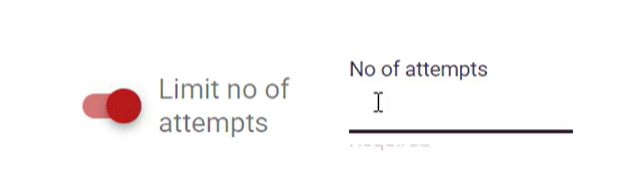
You can configure how many times a candidate can take each of your tests. You can even configure it so that unlimited attempts will be available.
If there is another test that follows, you can configure the continuation rule so that the maximum score, the minimum score or the average score will be counted to figure out if the candidate will be allowed to proceed with the next test.
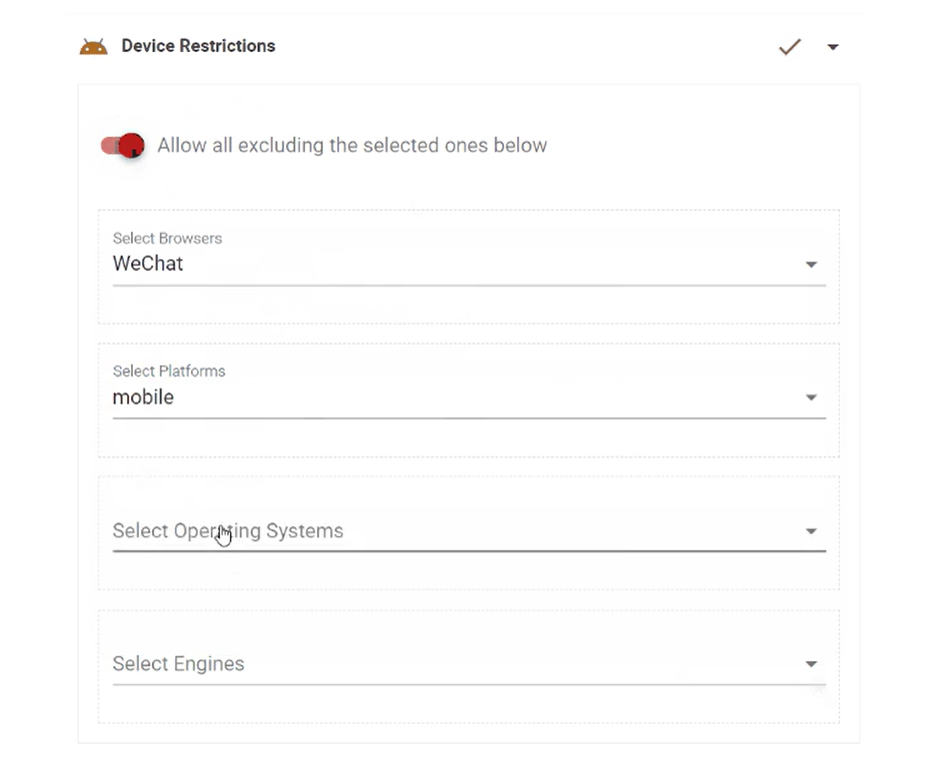
You can configure which devices will be allowed to start a test. You can allow or disallow browsers, platforms, operating systems and so on. You can both exclude or include the devices.
You can configure the monitoring option so that the candidate will be required to open a webcam before starting the test.
If you select the “Photo” option, the system will take photos throughout the testing. The proctors can stream the taken photos in real-time. The photos will also be recorded on the server and hence they can be seen after the test is complete.
If you select the “Video” option, the system will record the webcam video during the testing. The proctors can watch the real-time videos or they can watch the videos after the test is done.
You can configure the screen recording option so that the screen of the candidate is recorded throughout the testing.
If you select the “Screenshot” option, the system will take screenshots while the candidates proceed with the test. The proctors can stream the screenshots in real-time. They can also get access to the screenshots after the test is done.
If you select the “Screenshot” option, the system will take screenshots while the candidates proceed with the test. The proctors can stream the screenshots in real-time. They can also get access to the screenshots after the test is done.
You can select the safe test mode so that the test is delivered through the lockdown browser. The lockdown browser will enforce the user to move into fullscreen mode before starting the test. The lockdown browser is to prevent the user from accessing other windows, tabs or applications during the test. Lockdown browser is among the best security practices and hence is preferred to promote academic honesty and prevent cheating.
When the lockdown browser is enabled, the candidate has to complete the test in one-sit. The admin and test proctors can always let the candidate sit again by taking control.
You can configure when the system will automatically terminate the test session. For example;
Logs can be very helpful if suspicious events occur during a test. If you enable the logging, the system will maximize the number of logs it records so that more can be discovered.
When the logging level of the test is set to advanced, not only more logs will be recorded, but also new reports will be automatically generated so that the test administrator can have a better understanding of what happened during the test session. The reports will show how long the candidate spent in each section or page, as well as how many times a page has been visited etc.
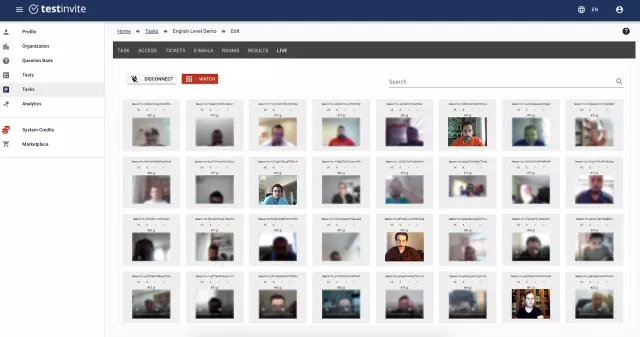
In order to have greater control over the assessment process, the administrators and the proctors can watch in real-time the progress of each testing session.
You can enable high performance servers to get better performance if you need to conduct a high number of simultaneous tests or exams. When you enable high performance servers for the delivery of a test, both more computing resources will be made available and the time to respond for each request will decrease.
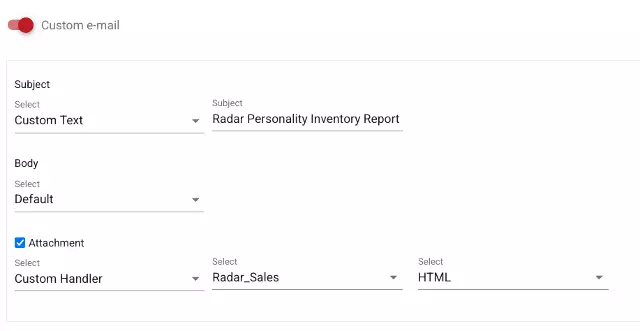
You can add email addresses to the notification list so that an email is sent whenever one of your candidates completes a test.
You can configure the subject and the body of the email to be sent when one of the candidates completes a test. You can customize it so that a file attachment can be created and sent with the email.
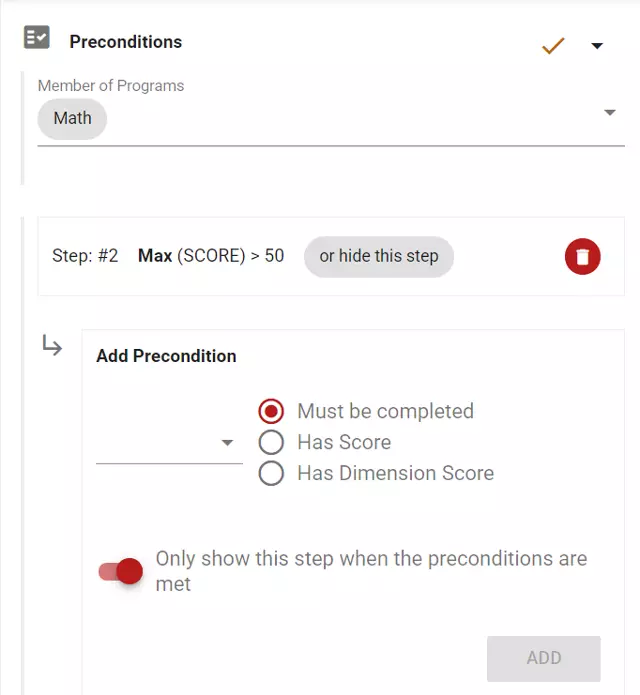
If you have an assessment where the candidate is to take multiple tests, you can add some pre-conditions to any of your tests so that only the candidates that had passing scores in the previous steps can proceed with the following test. Similarly, you can force the candidate to follow the given order of the tests.
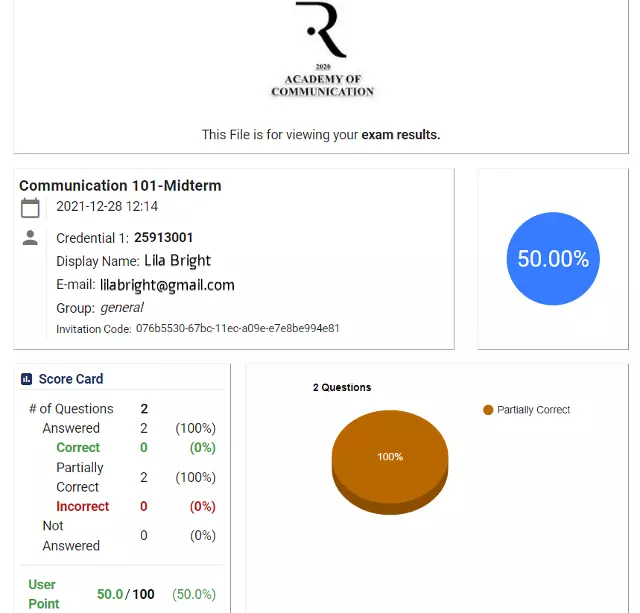
Multiple kinds of reports can be generated after a test is complete. By enabling the options, the system can generate different kinds of reports where each report displays another aspect of the test result, like Scores by Pages, Scores by Tendencies, Scores by Dimensions, Scores by Question Tags and so on.
You can import a reporting template and customize both the data and the look of the report. You can contact us to ask for a custom reporting template as well.

You can add custom rich content into the report of a test. You can add a logo, image, headings or formatted texts.
When a user completes a test, the test report is automatically generated. If you also want to include a “comparison card” where the user’s score is compared with a “norm”, then you can configure how the system will generate such a norm. The norms can be dynamically generated according to your selections or a norm can be created and stored statically.

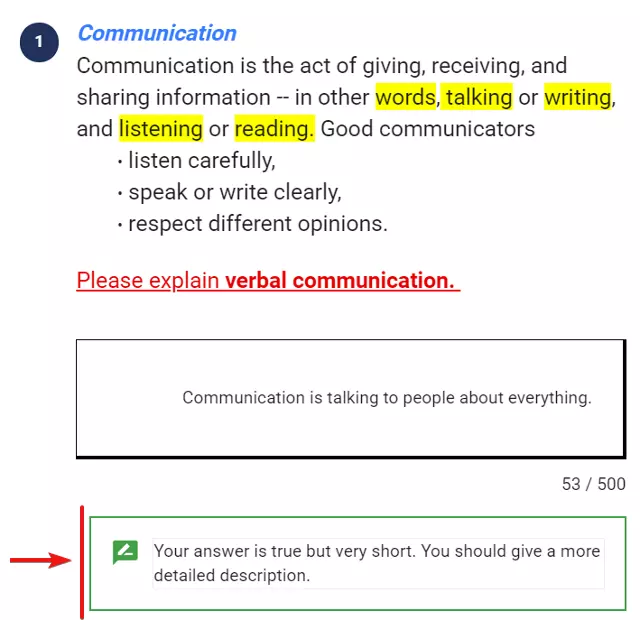
You can enable the feedback mode so that the candidate can get feedback about the answers and how he/she performed. You can configure what the user will be able to see.
You can add feedback for each question to explain the reasoning behind and the correct answer of these questions.

You can enable the feedback mode so that the candidate can get feedback about the answers and how he/she performed. You can configure what the user will be able to see.
Test results for tests having input questions which require evaluation can also include reviews from the evaluator. These notes can also be displayed under the test paper displaying option with “display questions’ feedback” setting.
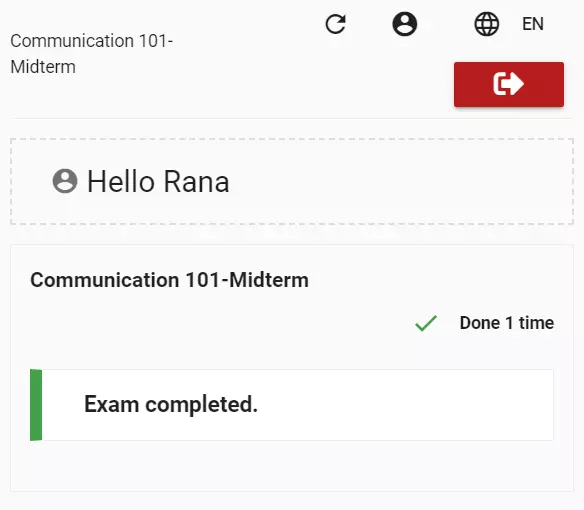
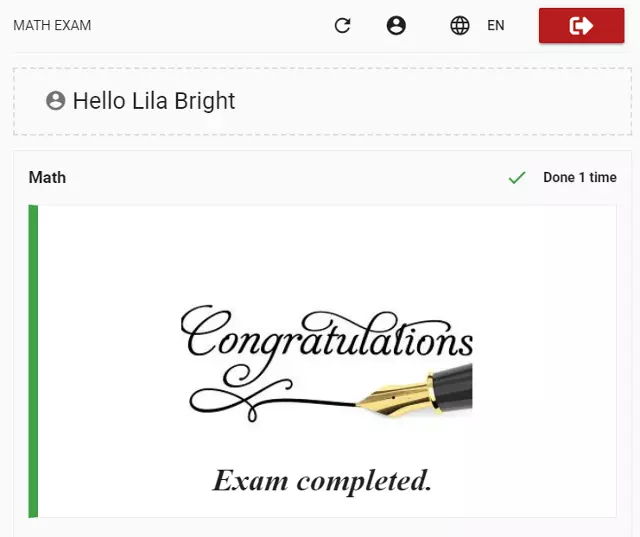
When you deliver a test in practice mode, the user will get immediate feedback everytime he/she submits answers. The system will make the overall score of the user available on the screen in real-time.

You can set up a message so that the system will display to the users who complete their test. The message can include formatted texts, images, links, audio or video.
If the assessment has multiple tests, you may want to assign only some of the tests to different target groups. To achieve this, you can create a “Program” and assign some of the tests with the Program. Then, when you invite a candidate to the assessment, you can associate the candidate with a Program so that he/she will be able to get access to the tests that are associated with this Program.
After your assessment configuration is done, you can start inviting people and everything will flow according to your configuration. However, there may be some cases where you would like to create exceptions for some candidates. In such cases, you can customize the settings for a candidate.
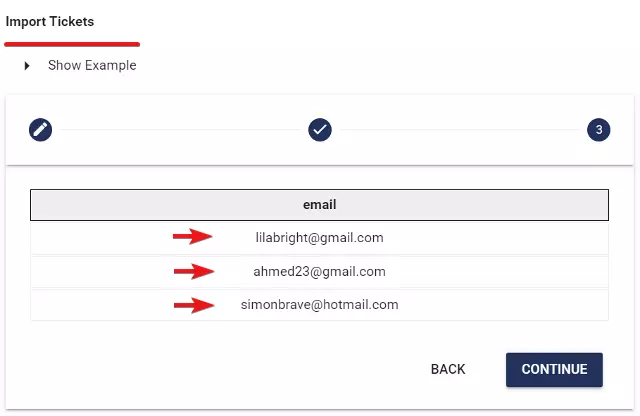
You can register candidates for the assessment either one by one or collectively.
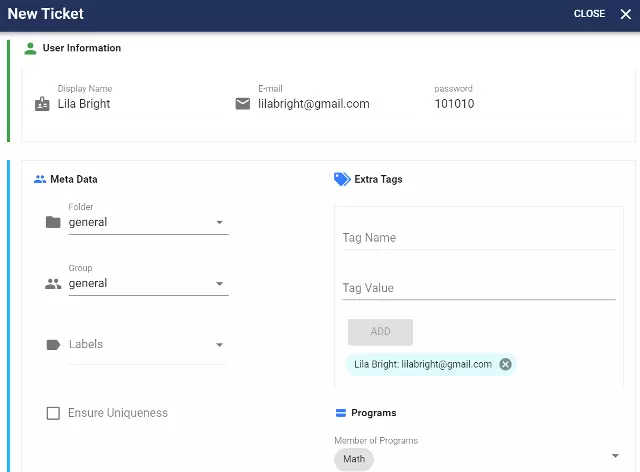
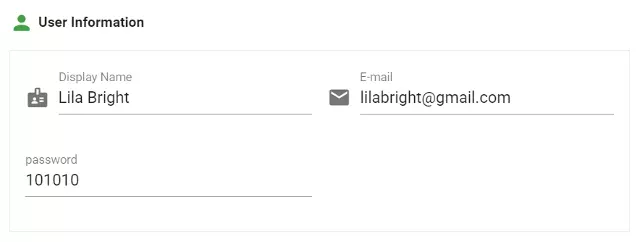
You can add candidates one by one to the assessment system. In order to do this, you have to create a ticket for each participant. There can be candidate's name, e-mail adress, group, kategory, tags, authentication informations on the ticket.
While registrating the candidate you can customize the assessment process for him/her through several settings. For example, you can customize exam's properties such as access dates or begining/ending hours for each candidate.
You can register multiple users at one time. In order to do this you can employ "import all" feature of the assessment system.
If you want to prevent from registrating the same candidate multiple times, you can enter proper data for each candidate and block the registration of the candidates who have the same datas.
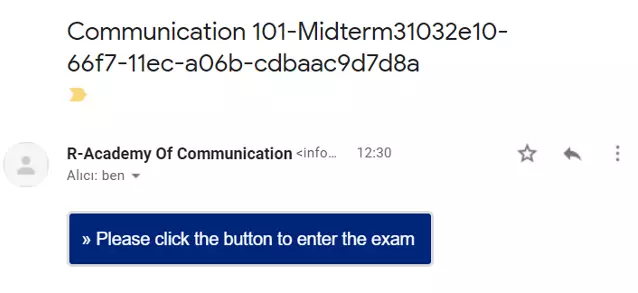
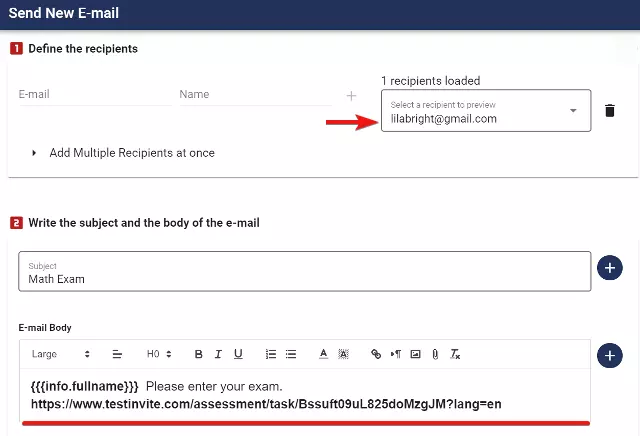
You can invite candidates through sending e-mails to them and determine the delivery date for e-mails. You can add easily accesible links and information by candidates to the title of the e-mail and to the text area which can be formatted by the rich content editor.
You can categorize candidates. In order to do this, you can either assign each candidate to a group or add tags to them for more advanced categorization.
The candidate categorization can be helpful for the administration of the assessment process and the retrieval of the exam reports. For example, in a large scale assessment, you can categorize candidates and assign a proctor for each category. In addition, you can retrieve exam results according to categories and compare them later.
You can proctor all exams simultaneously. You can monitor, which candidate started the exam, at which section s/he is, how many question s/he answered.
If a candidate can not finish the exam because of exceptional cases, you can let her/him continue taking the exam after having determined from which page s/he will continiue.
You can cancel any exam taken place. In this case, system will admit the exam as not made so, candidate can re-access to the exam.
