The proctoring materials and associated cheating detections can be navigated through in the Monitoring tab of the test report.
The proctoring panel of a test session
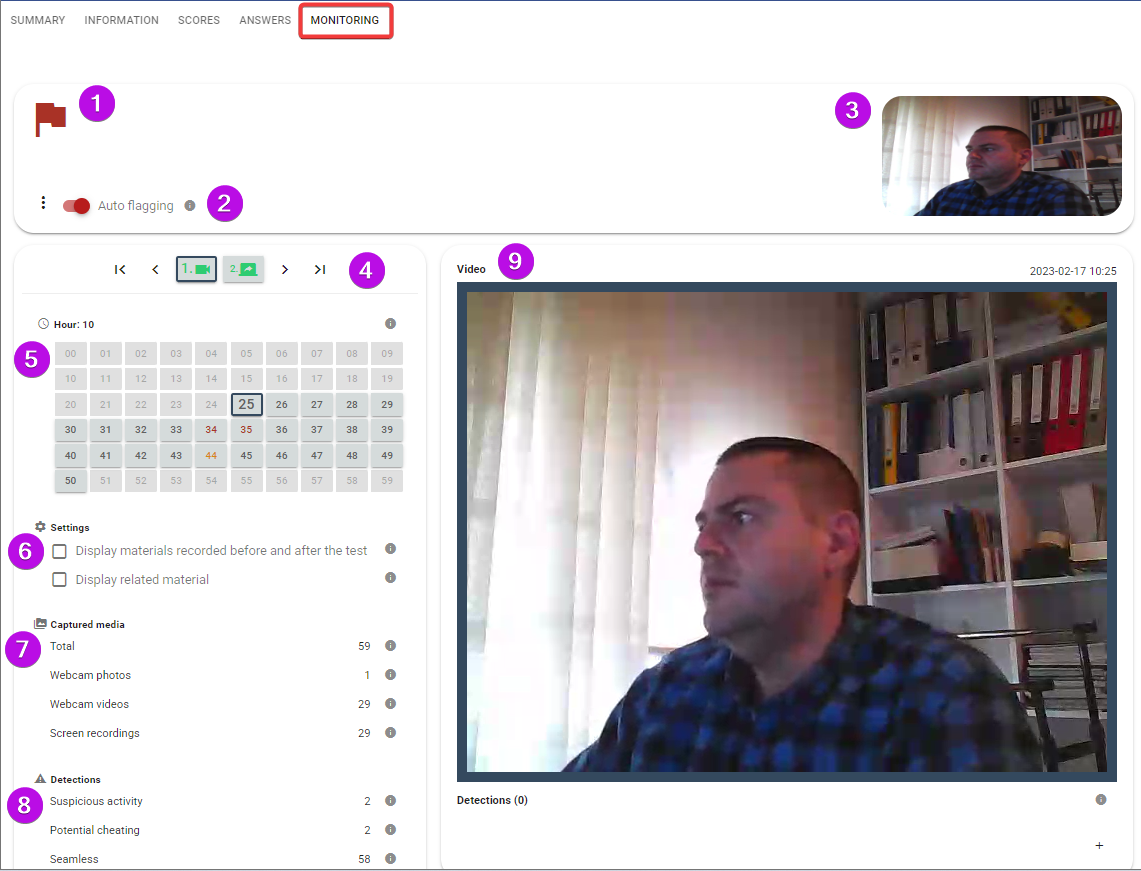
1. Flag
The flag represents the outcome of the proctoring process, and it can be one of several colors, each with its own interpretation:
A red flag indicates that there is evidence that suggests cheating may have occurred.
An orange flag indicates that there are some detections that raise suspicion.
A green flag indicates that no detections have been found that give rise to suspicion.
A brown flag indicates that further investigation should be conducted.
A gray flag indicates that no proctoring has been conducted yet.
2.Auto flagging
By default, the system automatically flags the test session based on the detections found in recorded materials. However, you can always turn off the automatic flagging and assign the flag manually.
Enabling auto cheating detection for a test session allows the AI-powered algorithms to automatically record any relevant detections, which can then be used to automatically set the flag for the session. However, you also have the option of manually reviewing all the materials and making your own determinations. If auto flagging is enabled, the flag for the session will still be set automatically based on the recorded detections.
Turn off the automatic flagging option and set the desired flag manually.
3. Initiation photo
The photo captured at the start of the test session is positioned in the upper-right corner of the screen.
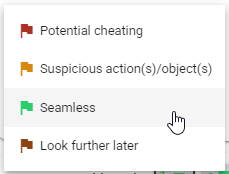
4. Navigating the recorded proctoring materials
You can use the left and right arrows to move through the recorded proctoring materials. The icons located between the arrows indicate the type of each recorded material for the same minute.
There are 2 materials recorded at 10:25. The first material is a video recording the second is the screen recording.
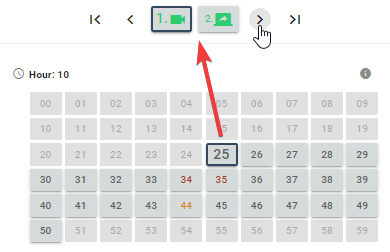
5. The timeline of the test session
The timeline panel is organized by hour, and a button is displayed in the grid for each minute of the test session. Clicking on the button for a particular minute will take you to the corresponding recorded proctoring materials for that hour and minute.
If any of the recorded proctoring materials have been flagged for a detection, the color of the button will indicate this.
When you click on a button on the timeline, 2 things happen.
The navigation buttons below displays the recorded materials in the specified minute and hour.
6. Settings
By making your selections, you can configure the presented materials.
7. Captured media
Recorded proctoring materials categorized by type and quantity