It is possible to divide an assessment flow into several stages through which candidates can progress.
There are two main applications of stages in the assessment process.
- The first is to categorize candidates based on the stages they are in, which is facilitated by creating distinct stages and advancing candidates through them.
- The second is to customize the assessment flow according to the candidate's current stage, allowing for a more tailored and efficient assessment process. This can include implementing a multi-step assessment where candidates can only access specific tests (steps) once they have advanced to a certain stage in the assessment.
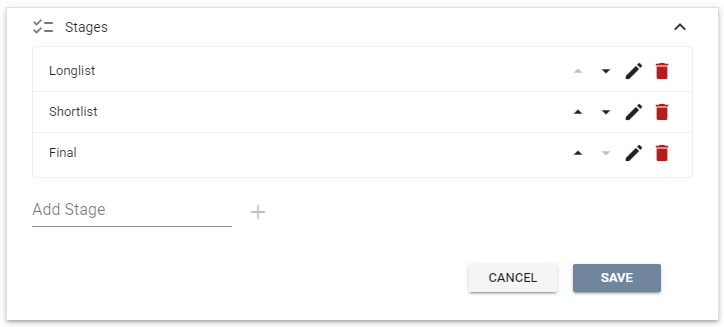
Defining the stages
To define the distinct stages of an assessment process, navigate to your Task's settings and open the Miscellaneous panel and expand the Stages section.
You can create stages and organize them in the desired order.
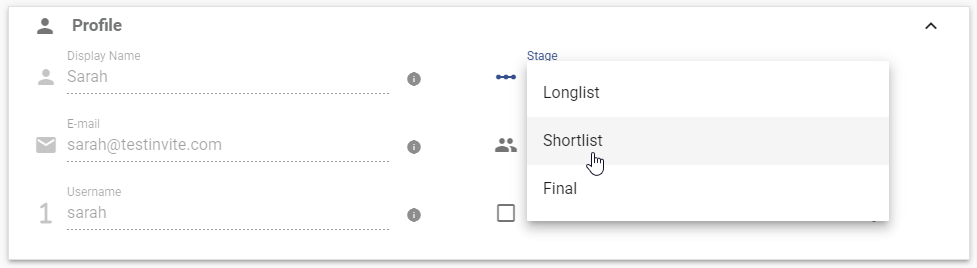
Assigning a stage to a candidate
Once the stages have been defined, the candidate registration panel will begin to feature the option for selecting a stage.
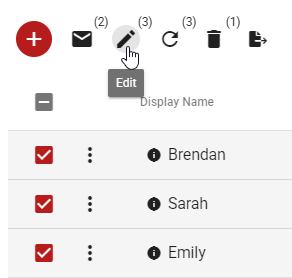
Assigning a stage to multiple candidates
To assign a stage to several candidates at once, go to the candidates panel of the Task, retrieve the appropriate list of candidates, select multiple candidates, and then click on the Edit button at the top of the table.
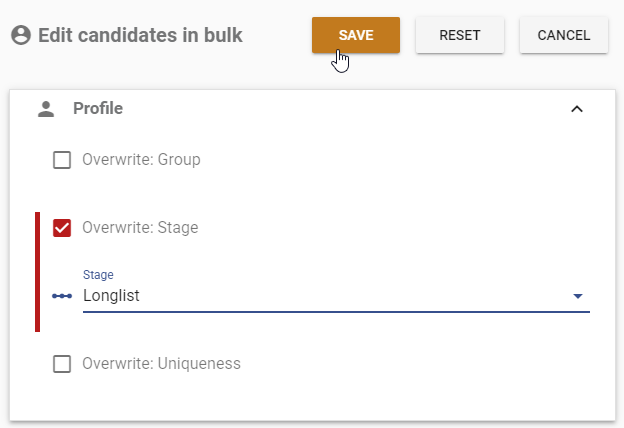
Once you have accessed the bulk candidates update panel, choose the "Overwrite: Stage" option and indicate the desired stage that you wish to assign to all selected candidates. Finally, click on the Save button to proceed with the changes.
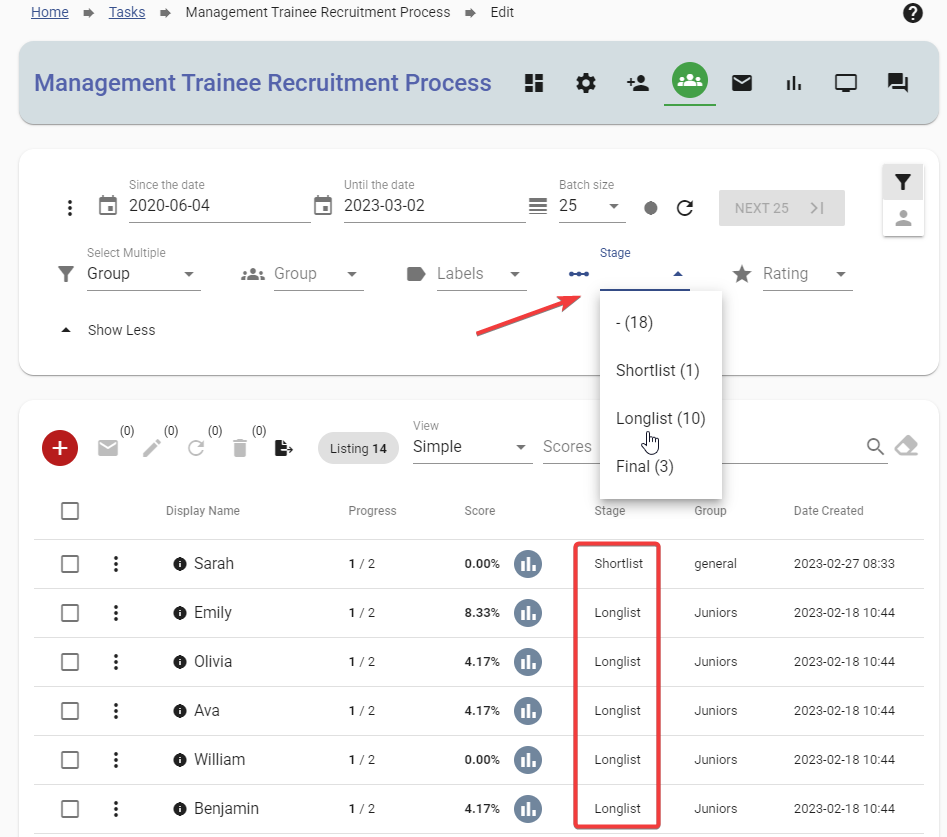
Retrieving the list of candidates who are in a particular stage
After defining the stages, the candidate search panel will feature the Stage filter. You can choose one of the defined stages to obtain a list of candidates assigned to that stage.
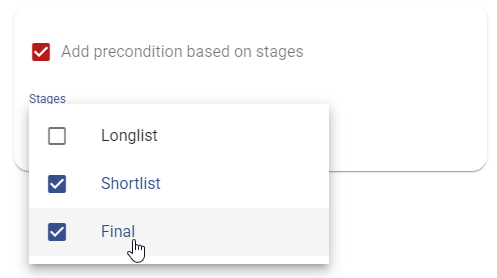
Establishing a stage as a requirement for a step in the assessment process
You can prevent candidates who are not assigned to a particular stage from accessing a step in your Task. In other words, you can make it a prerequisite for candidates to be assigned to a particular stage before allowing them to access one of your steps in the assessment process.
To establish a stage as a requirement for a step, navigate to the Task settings, expand the Steps panel, click on the orange gear icon beside the desired step, and access the Prerequisites section. From there, choose the "Add precondition based on stages" option and indicate which stages should be permitted for the step.
An example of a use case
Suppose you have designed an assessment consisting of two tests. The first test is accessible to all candidates. Once the first test is completed, you want to review the resumes of candidates who performed well on the test and allow only a select few to proceed with the second test. To accomplish this, you can create a single stage called "Shortlist" and assign it to the chosen candidates. Additionally, you should designate the "Shortlist" stage as a prerequisite for the second test.