There are various instances during an assessment when emails may need to be sent to candidates, including but not limited to inviting them to the assessment, sending reminders, providing updates on their progress, announcing the results, and more.
The email configuration in your Task manager is automatically saved and updated every time you send an email to a candidate, so that if you need to send the same email again, the same configuration is readily available for ease of administration.
If you only need to send one type of email, usually the invitation email, the approach mentioned above works effectively. However, if you plan on sending multiple emails during the administration of the assessment, email templates can be used.
By using email templates, you can create and store several templates for different purposes, such as inviting candidates, informing them about a reinstated test session, announcing results, and more. This makes it easier to quickly send out pre-defined emails when needed.
Creating a new email template
To generate a new email template, choose a candidate with an assigned email address and click on the email button. The email generator will open.

Then, set up your email just as you would when sending a regular email.
- Craft the subject line.
- Compose the body of the email.
- Add the assessment access button.
- Enter the sender information.
- Preview your email.
When everything looks good, click on the templates section located at the top of the email generator to expand it.

Click on the "Save as" button, and then give your template a new name to save it.

Using templates
Once you have saved one or more templates, you can switch between them by selecting the desired template.
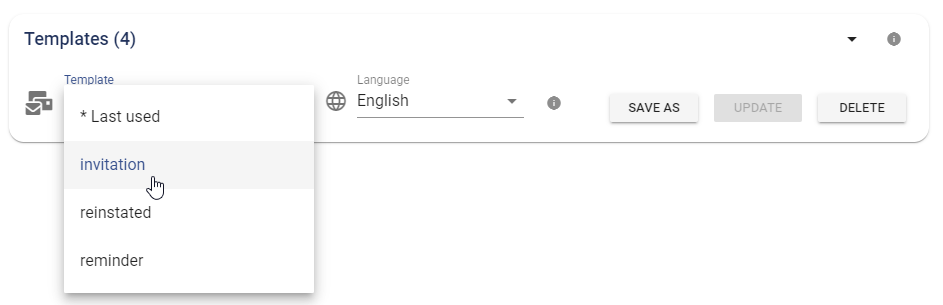
Updating a template
To make changes to a template, select the template you want to modify, make your desired updates, and then click on the Update button within the Template panel.
Deleting a template
To remove a template, select it and click on the delete button.
