Testinvite provides multiple options for inviting a candidate to participate in the assessment.
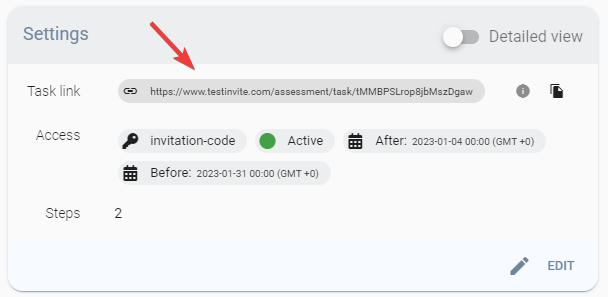
Each of your tasks is assigned a distinct URL, providing candidates with access to the task. The URL for the task can be located on the task dashboard within the settings section.
By sharing the task link with a candidate, they will encounter the welcome page of the task, the contents of which can be customized.
If the authentication for your task is set to 'Public access', simply sharing the task link with the candidate is sufficient. The task link can be shared either through manual means (copying and pasting) or via invitation emails. To send invitation emails, go to the Candidates panel, select the desired candidates, press the email button, and create your invitation email incorporating the task link within the email body.
If the authentication method for your task is not "Public access", the welcome page of the task will feature a login panel where candidates can enter their credentials to gain access to their assessment.
Each registered candidate will be automatically assigned a unique invitation code, enabling the system to identify the specific candidate.
Upon registering a candidate, you can obtain access to the candidate's personalized access link, which is generated exclusively for them. This link allows the candidate to participate in the assessment without having to supply any credentials, as the invitation code is already incorporated in the link.
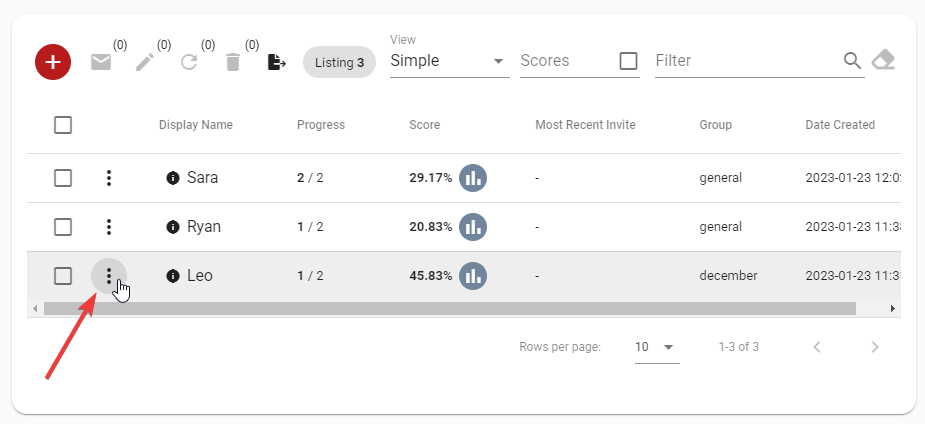
You can copy the access link for each candidate by clicking the menu button beside each candidate and selecting 'Copy access link' from the available options. After copying, you can share this link with the candidate.
You can send email invitations to candidates with a registered email address and supply them with their login credentials. To send out email invitations, choose the desired candidates and press the email button on the toolbar.

Pressing the Email button opens a new dialog that will assist in crafting the desired email, including any personalized information you wish to provide.
The email builder enables you to configure the subject, body, assessment access button, sender name, and reply-to email. You can choose to send emails immediately or schedule their delivery for a later date.
You can create your preferred subject line. The subject line can include placeholders that will automatically be replaced by the corresponding values that the candidate possesses.
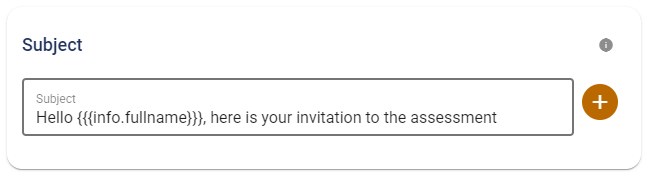
The subject line can incorporate placeholders, such as the candidate's name, the title of the task, the candidate's group, and the values of tags shared among all the candidates.
To incorporate a placeholder, click the orange 'Add' button adjacent to the subject line editor.
You can compose the body of the email, which can include placeholders that will automatically be substituted with the corresponding values that the candidate holds.
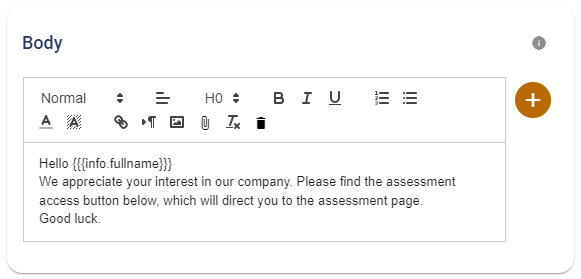
The email body can also be used to provide the necessary information to access the assessment, including:
To incorporate a placeholder, click the orange 'Add' button adjacent to the editor.
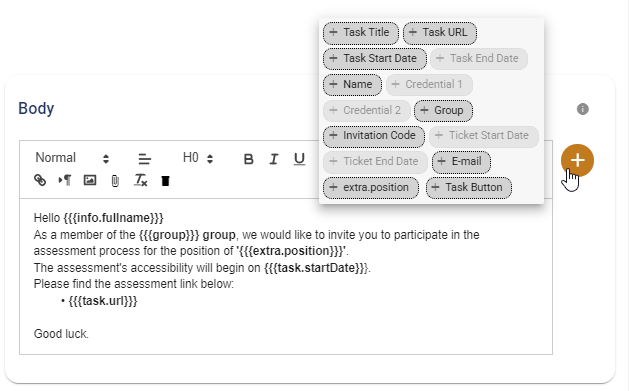
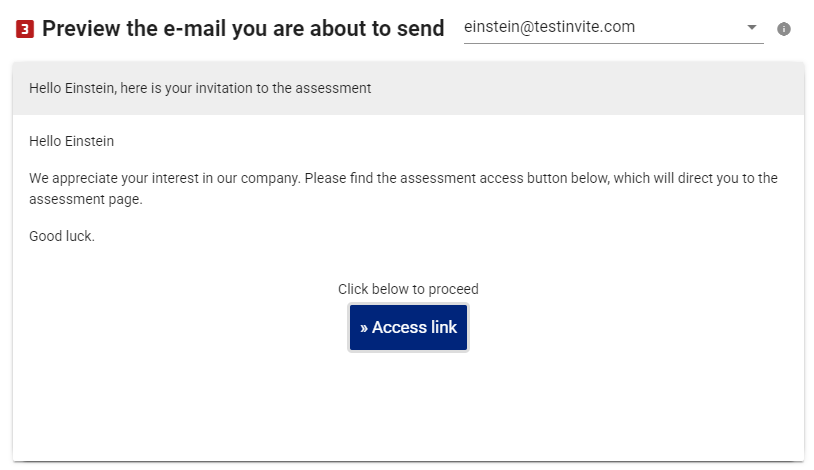
The invitation email can automatically include an assessment access button, which, when clicked, will direct the candidate to the assessment page. The label of the access button as well as the caption text above it can be customized by your end.

When the Direct login option is selected, the button will directly provide access to the candidate without the need for them to supply the invitation code.
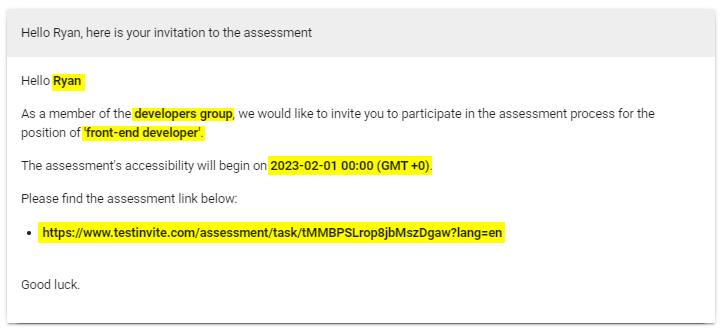
After crafting the subject and body of the email, use the preview panel to ensure that everything is functioning properly. The preview panel enables you to choose any of the recipients and view the email they will receive.
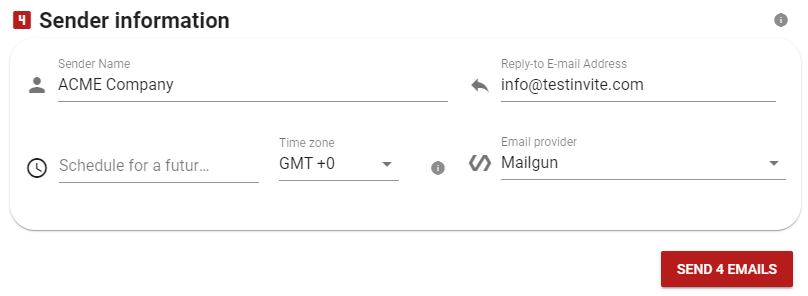
You can set the name of the sender and the reply-to email address, which will be the email that candidates will reply to if they respond to the email.
Testinvite offers multiple email providers to mitigate any difficulties you may face if one of the email providers is not delivering high inbox rates. You can select from the available options.
You have the option to either send the invitation emails immediately or schedule their delivery for a future date.

Author
