Testinvite offers a great deal of flexibility in terms of incorporating various methods for accessing your assessments and completing the tests. These methods include:
- Implementing the use of unique, automatically generated invitation codes for each candidate.
- Implementing a unique, individual credential such as a passport number, ID number, or user ID to authenticate each candidate.
- Creating a pair of login credentials, such as a username and password, for each candidate.
- Making the task publicly accessible by allowing access to anyone who visits the task link.
- Securing access to the task by utilizing a password shared among candidates.
Let us examine each option in depth.
Using unique invitation codes
This feature enables simple tracking of candidates through unique invitation codes generated by the system for each individual candidate. Each invitation code is valid for one-time use, guaranteeing that every candidate is given an individual opportunity to complete the assessment.
Choosing this option allows for easy registration and emailing of invitations to candidates. The system automatically appends an invitation code to the task link in the email, allowing candidates to access the assessment by simply clicking the provided link.
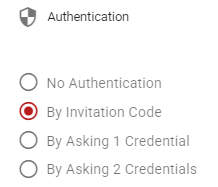
To implement this option, navigate to your task settings, open the Access section, and expand the Authentication panel. Select "Invitation code" from the options presented.
Using one credential to grant access
Invitation codes can be useful when distributed through emails, but they can be difficult to communicate without digital channels. An alternative is to create a unique credential for each candidate. This credential can be named to make it clear what information is needed to access the assessment.
For example, if you have the ID number of each candidate, you can name the credential "ID number" and have candidates enter their ID number to gain access to the assessment. This way, you can inform candidates that they can access the assessment by entering their ID number.
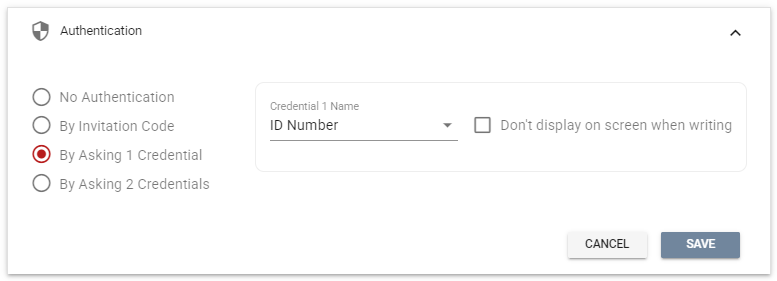
To implement this option, navigate to your task settings, open the Access section, and expand the Authentication panel. Select "1 credential" from the options presented and then name your credential.
Once you have set up the access method as described, you will need to begin registering candidates by entering their ID number (the credential) in the system.

Benefits of implementing this option
It may not be necessary to share credential information with each candidate as they may already be familiar with it, which simplifies the administration process.
Drawbacks of this option
Providing candidates with a unique credential to access your assessment can lead to security risks if they share that information with others. For example, if one candidate knows another candidate's ID number, they could potentially take the assessment on their behalf.
Using two credentials to grant access to the assessment
This method is similar to a previously mentioned approach, however, it requires two credentials from each candidate instead of one. The second credential, typically a password or similar, is used to increase security. You can label each credential, such as "username" and "password", during registration. Candidates can then access the assessment by entering their unique username and password.
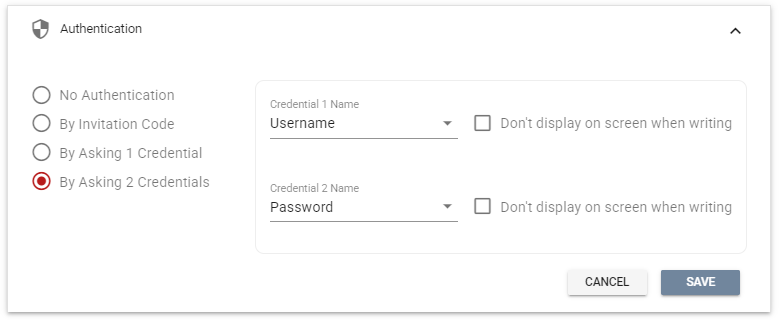
To implement this option, navigate to your task settings, open the Access section, and expand the Authentication panel. Select "2 credentials" from the options presented.
Making the task publicly accessible
This option enables access to the task for anyone who visits the task link, allowing them to take the tests within. As visitors are not tracked, they have the option to begin the assessment anew by logging out and logging back in or using a different computer or browser.
Benefits of implementing this option
- This option may be suitable if you wish to avoid the time and effort of registering candidates and inviting them to the task.
- Another potential scenario for this option is to share the task link on your website, social media accounts or advertisement, enabling easy access to the assessment for any visitor.
Drawbacks of this option
- As candidates are not tracked, it is not possible to guarantee that each person only has one opportunity to take the assessment. They may take the assessment multiple times at their convenience.
- Although you can include forms that require personal information to be filled out at the start of the assessment, there is no way to confirm the accuracy of the information provided, resulting in test results that cannot be accurately linked to specific individuals.
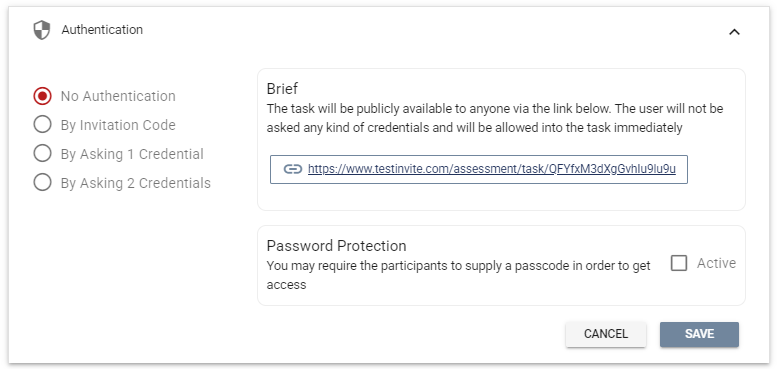
How to implement this option
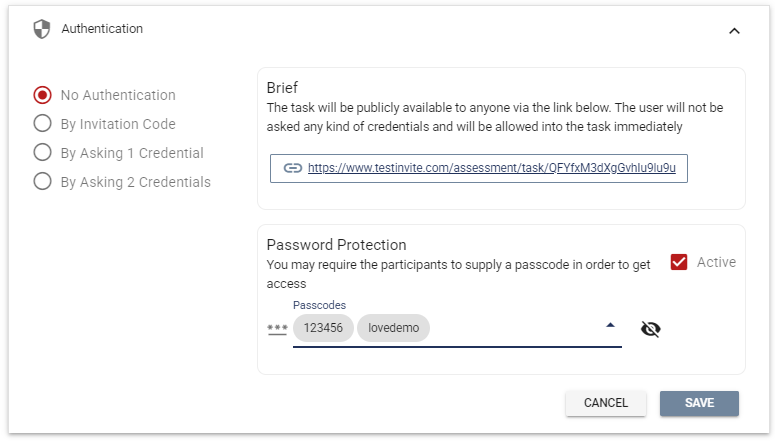
Navigate to your task settings, open the Access section, and expand the Authentication panel. Select "No authentication" from the options presented. Make sure that the Password Protection is not set to active.
Secure task access with a shared password among candidates
This option is similar to the previous method, but requires a shared password for a visitor to gain access to the task.
This option may be more suitable if you wish to limit access to a certain extent. However, as the system does not track candidates, they can still take the assessment multiple times by using different computers or browsers, etc.
How to implement this option
- Navigate to your task settings, open the Access section, and expand the Authentication panel. Select "No authentication" from the options presented.
- Activate the Password Protection and enter one or a few passwords. Candidates who writes any one of the defined passwords will get access. You can change the password over time.