To create a new test
Once you have created your test, the test designer interface will open.
Using the test designer, you can design the structure of your test by constructing sections and pages, and adjust the settings of each component to meet your needs.
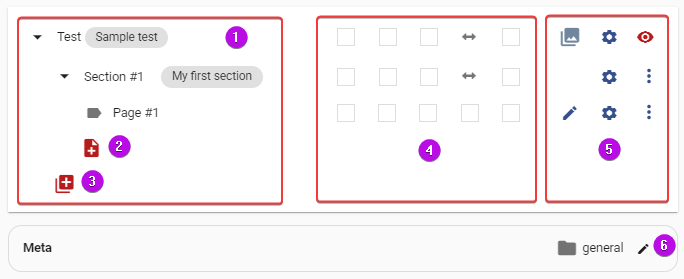
The left-hand side of the interface (1) displays the comprehensive layout of your test, containing all the sections within the test and the pages contained within each section.
To include additional pages within a section, simply click on the red plus symbol (2) located below the final page of the respective section.
To append a new section to your test, select the red plus icon (3) located at the bottom of the interface.
The middle panel (4) exhibits the most significant settings of the corresponding item, arranged in line with the respective component.
The panel located on the right-hand side (5) permits you to customize the settings of the entire test, in addition to each section and page contained within the test.
You can use the bottom row (6) to configure the folder for storing your test in your tests bank, and associate tags with your test to aid in the administration and organization of your tests.

Author
